Learn How to use Context and Reducer Hooks in React.js by Creating a Global Snackbar.
Discover the power of Context & Reducer Hooks in React.js by creating a global snack bar using TypeScript and bootstrapping with Vite.
I'm currently a student at SRMIST, pursuing ECE. I love coding, learning and making web development projects, reading and writing and creating YouTube videos.
The Context (createContext and useContext) and the Reducer (useReducer) hooks in React.js might seem to be complicated and in the beginning, I felt that too. I had used them before, but never really understood fully how they worked, until I tried implementing them in a test project.
In this tutorial, I'll show you,
Why and how you can use the Context and Reducer Hooks,
Bootstrap your React.js App with Vite,
Create a Global state management system using them and
Create a snack bar that can be accessed anywhere from your application (without having to perform prop drilling)
Here's the GitHub Repository that I'll be following along for this tutorial. You can skip to it directly if you're interested.
Prerequisites
Familiarity with JavaScript.
React Fundamentals (Components, Data Handling, Hooks (useState, and useEffect).
Let's begin...
Why use Context and Reducer Hooks?
One of the most common issues you'll run into react is that you'll end up passing down states and their set state functions as props from one component to another, and end up going 5 - 10 levels down. This is known as prop drilling.
This is bad because when one of your states faces an issue, tracking it back to its parent is going to be a nightmare 😱 and whenever you change the value of a state, all the components where the state was passed down will undergo rerendering, even the ones where you're not using the state at all.
Context Hooks to the Rescue! 🦸
The Context Hooks allows access to data from a higher level without having to pass it down from one component to other.
In the traditional approach, you would create a state at the top level and then pass it down from one level to the next. With Context however, you just need to create a Context Object, use the Context Provider to wrap your application with it and then either use the Context Consumer or the useContext Hook to access the data from the Context.
Creating a Context
React.createContext() is used to create a context object (the data that you want to keep global), it takes in its argument as the initial value of the context object.
export const AppContext = React.createContext({ theme: 'light'});
Providing the Context to Your Application
After you've created the context object, the next step is to use the AppContext.Provider to give access to the context object to the components under the provider.
Think of it this way, if there's some water, and you need to pass it down to 3-4 pipes at a time, but you have only one tap. How would you do it? You would create a pipe to provide to all the other pipes from the tap.
It's the same way the Provider is used to give access to the context object to all of your other components as well.
The tap here was the flow of the data and the water here is the data itself, so with the provider, you'll need to pass in some value as well. This value that you pass can be accessed by consuming the context. (Coming up on the next section)
import { AppContext } from './AppContext';
import Navbar from './components/Navbar';
import Footer from './components/Footer';
import Main from './components/Main';

const App = () => {
    const [theme, setTheme] = useState('dark');
    return (
        <AppContext.Provider value={{theme, setTheme}}>
            <Navbar />
            <Main />
            <Footer />
        </AppContext.Provider>
    )
}

export default App;
Using the Context in another Component
Once the provider is set up, we can access the context data in two ways. By using the AppContext.Consumer or the useContext hook.
The Consumer component returns a function through which you can access the context data and then return the component you want to use the data in.
/* Navbar.js */

import React from 'react';
import AppContext from '../AppContext';

const Navbar = () => {
    return (
        <AppContext.Consumer>
            ({theme}) => (
                <nav className={`${theme}`}
                    ...
                </nav>
            )
        </AppContext.Consumer>
    )
};

export default Navbar;
Or you can alternatively use the useContext hook as well to access the data from AppContext.
/* Navbar.js */

import React, {useContext} from 'react';
import AppContext from '../AppContext';

const Navbar = () => {
    const {theme} = useContext(AppContext);
    return (
            <nav className={`${theme}`}
                ...
            </nav>
    )
};

export default Navbar;
Upgrade with the Reducer Hook 📈
Now that we've successfully brought up our data to a global level, there's still an issue! We still end up using the useState hook to create states and state dispatchers. And we'll still end up importing various setState types of functions to the components where we'll need them and cloud the context object with the number of states.
An alternative approach could be a create a complex state, have only one state object and one set state, but then you'll end up writing complex logic for each use case of where you're implementing the state. This is not exactly the best practice.
We can instead switch to a more action-based method of updating your application state using the Reducer Hook. It's pretty simple to set up and use throughout your application.
The useReducer Hook
The useReducer hook takes in two arguments. The first is a reducer function and the second one is the initial value of the state. It returns the state and a dispatch function which is used to update the state, it's pretty similar to thesetState function that we use to update the state's value.
import {useReducer} from 'react';

const App = () => {
    const [state, dispatch] = useReducer(reducer, {theme: 'dark'});

    return (...);
}

export default App;
Dispatch Function
The Dispatch function is very similar to the setState. You can pass in an argument to update the state. When the dispatch function is called, it triggers the reducer function (mentioned below) which is used to return the updated state value.
The dispatch function doesn't return any value, rather it's only used to send a new state value that needs to be updated.
Reducer Function
The reducer function is called every time the dispatch function is called. It takes in two arguments, the previous state and an action object.
In general, you can set up your own logic to update the state, however, with the action approach, you can make state updates more action-oriented. But what does the action object contain? What you pass in the dispatch function can be accessed in the action object.
It contains the type of action you want to perform and the payload (state updates) that are associated with that action type. So, you'd see tons of applications having a switch case statement inside the reducer function to handle various action types and update the state based on the payload.
The reducer function returns the updated state which is then reflected wherever the state object from the useReducer hook is used.
const reducer = (state, action) => {
    switch (action.type) {
        case 'LOGIN': {
            state.user = action.payload;
            state.isLoggedIn = true;
            return {...state};
        }
        default {
            return {...state}
        }
    }
};

export default reducer;
Create React + TS App With Vite
Bootstrapping a React application with TypeScript using Vite is pretty simple and straightforward. You can follow the steps mentioned below or follow the Vite documentation for detailed instructions.
Using Yarn
yarn create vite global-snackbar-app --template react-ts
cd global-snackbar-app
yarn
Create the app, open it up and install all the dependencies.
The default Vite setup should be something like the one mentioned above. Next up just start the application using the following command
yarn run dev
Application Set Up 🤖
Most of our application set-up will be inside the src folder, the file structure is mentioned below and a quick overview for each as well.
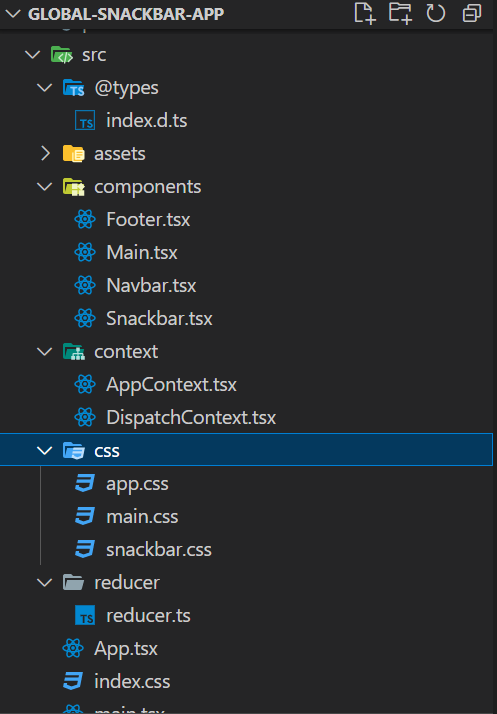
@types/index.d.ts - The Type declarations that will be common throughout our app are declared here.
components - The various components of our app.
context - Keeping the context separate from the app. Separating the state from the application.
css - Application Styling CSS files
reducer - The reducer function is declared here with the logic for each action type declared in it.
Before we get started with setting up the system, visit the repository associated with this project so you can follow along with the implementation - https://github.com/kunalkeshan/global-snackbar-with-react-typescript-context.
Global State Management System 🌐
We're going the combine the Context and the Reducer Hooks to create a global state management system. Context is used to provide and consume the state throughout the app while reducer is used to update the state with the dispatch function and keep them action-oriented.
Creating a Context
We'll be creating two different contexts. One for the application state and the other for the dispatch function.
/* context/AppContext.tsx */

import { createContext } from 'react';

const AppContext = createContext<AppState>({} as AppState);

export default AppContext;
/* context/DispatchContext.tsx */

import { createContext } from 'react';

const DispatchContext = createContext<DispatchContextType>(
    {} as DispatchContextType
);

export default DispatchContext;
The AppState and the DispatchContextType are present in the @types/index.d.ts file. The code for the App and the Dispatch context is easy, we're using the createContext Hook from react to create the context we want and we're exporting it to access it from other components.
Reducer Function
The reducer function is where we'll keep the logic for the state updates which is mentioned below.
/** reducer/reducer.ts
 * Reducer Function
 */

// Dependencies
import React from 'react';

const reducer = (state: AppState, action: AppActions) => {
    switch (action.type) {
        // When snackbar is open,
        // - spread the previous value
        // - spread the payload (override prev values)
        // - set open to true
        case 'OPEN_SNACKBAR': {
            state.snackbar = {
                ...state.snackbar,
                ...action.payload,
                open: true,
            };
            return { ...state };
        }
        // When snackbar is close
        //  - set open to false
        case 'CLOSE_SNACKBAR': {
            state.snackbar.open = false;
            return { ...state };
        }
        default: {
            return { ...state };
        }
    }
};

export default reducer;
Based on the action type that is passed into the dispatch function, the snack bar can either be opened or close. When it's to be opened, the data is updated with the previous data and the updated data from the action payload.
While closed the open state of the snack bar is updated to false.
Putting it all Together
Now that the Context and the reducer are defined, we need to use those to provide our application as a whole. This is done in the App.tsx file.
/**
 * App.tsx
 */

// Dependencies
import React, { useReducer } from 'react';
import reducer from './reducer/reducer';
import AppContext from './context/AppContext';
import DispatchContext from './context/DispatchContext';
import Footer from './components/Footer';
import Main from './components/Main';
import Navbar from './components/Navbar';
import Snackbar from './components/Snackbar';
import './css/app.css';

function App() {
    // useReducer with the reducer func from './reducer/reducer.ts'
    // The second arg is an initial value for the application state
    const [state, dispatch] = useReducer(reducer, {
        snackbar: {
            message: '',
            type: 'error',
            open: false,
            position: 'bottom-right',
        },
    });

    // state is passed into the app context
    // dispatch function is passed into the dispatch context
    return (
        <AppContext.Provider value={state}>
            <DispatchContext.Provider value={dispatch}>
                <div className='App'>
                    <Navbar />
                    <Main />
                    <Footer />
                    <Snackbar />
                </div>
            </DispatchContext.Provider>
        </AppContext.Provider>
    );
}

export default App;
The reducer function is passed into the useReducer hook and the state and the dispatch from the hook are passed into their respective context providers.
Global Snackbar
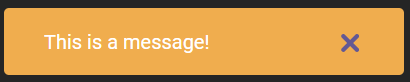
A basic snack bar has some of the following properties, a message, a type (success, error, info, warning), its positioning and whether it to be open or closed. The mentioned ones are what we'll be implementing.
message - string
open - boolean
position - string (bottom-right, bottom-left, top-right, top-left)
type - string (success, error, info, warning)


We can add other properties as the time it should stay open, passing in custom classes and styling, or even custom onClose functions, and for this project, they're currently out of scope.
Foundation + Styling 🎨
The layout for the snack bar will consist of the message and the button to close it. We'll add the functionality soon, for now, we just have to set up the snack bar.
/**
 * Snackbar Component
 */

// Dependencies
import React from 'react';
import '../css/snackbar.css';

const Snackbar = () => {
    return (
        <div>
            <p>Snackbar Message over here</p>
            <button>
                ✖️
            </button>
        </div>
    );
};

export default Snackbar;
The styling for the snack bar is given below. Using CSS Variables we can set the 4 states of the snack bar and change its colour as and when it's dispatched. By default, the snack bar is hidden and is set to open when the show snack bar action is dispatched.
/* Snackbar Colors */
:root {
    --success-bg: #5cb85c;
    --error-bg: #d9534f;
    --info-bg: #5bc0de;
    --warning-bg: #f0ad4e;
}

/* Snackbar Container */

.snackbar {
    position: absolute;
    display: none;
    padding: 1em 2em;
    align-items: center;
    justify-content: space-between;
    width: min(100%, 320px);
    height: min-content;
    border-radius: 4px;
}

.snackbar button {
    all: unset;
    cursor: pointer;
}

/* Snackbar Position classes */

.top-right {
    top: 2rem;
    right: 2rem;
}

.top-left {
    top: 2rem;
    left: 2rem;
}

.bottom-left {
    bottom: 2rem;
    left: 2rem;
}

.bottom-right {
    bottom: 2rem;
    right: 2rem;
}
Functionality ⚙️
To add the functionality we'll need both the AppContext and the DispatchContext in our snack bar. We destructure the snackbar state from the AppContext and the dispatch function from the DispatchContext.
The position is set as a className and these are already determined in the snackbar.css and the background colour is set into the style object of the div enclosing the snack bar.
We've used the dispatch function to close the snack bar when it is clicked or when the timeout runs out after 6 seconds when it is open. (The timeout can be set as a property in the snack bar state too!)
/**
 * Snackbar Component
 */

// Dependencies
import React, { useContext } from 'react';
import AppContext from '../context/AppContext';
import DispatchContext from '../context/DispatchContext';
import '../css/snackbar.css';

// Can be added as a state to snackbar too!
const AUTO_CLOSE_SNACKBAR_TIME = 6000;

const Snackbar = () => {
    // Get the snackbar state and the dispatch function
    // using the useContext Hook
    const { snackbar } = useContext<AppState>(AppContext);
    const dispatch = useContext<DispatchContextType>(DispatchContext);

    // When snackbar is open, close it after the auto close time
    /**
     *! This is a very raw approach!
     *? A better implementation would've been
     *? to batch each snackbar dispatched
     * */
    if (snackbar.open) {
        setTimeout(() => {
            dispatch({ type: 'CLOSE_SNACKBAR' });
        }, AUTO_CLOSE_SNACKBAR_TIME);
    }

    return (
        <div
            // Setting the position and the
            // type from the state
            className={`snackbar ${snackbar.position}`}
            style={{
                display: snackbar.open ? 'flex' : 'none',
                backgroundColor: `var(--${snackbar.type}-bg)`,
            }}
        >
            <p>{snackbar.message}</p>
            {/* Dispatch close snackbar when the close button is clicked */}
            <button onClick={() => dispatch({ type: 'CLOSE_SNACKBAR' })}>
                ✖️
            </button>
        </div>
    );
};

export default Snackbar;
Usage with Context + Reducer 🦾
In both cases, you'll need to get the dispatch function from the DispatchContext and call it when you need to use it.
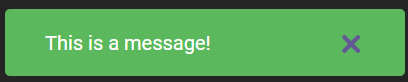
Opening a Snackbar
dispatch({ type: 'OPEN_SNACKBAR', payload: {message: 'Hello, there!', type: 'success', position: 'bottom-right'});
Closing a Snackbar
dispatch({ type: 'CLOSE_SNACKBAR' });
Summing It Up
With the combination of the Context and the Reducer Hooks from React, we can create a global state management system that's very similar to Redux. We implemented this system in a snack bar that can be accessed throughout our application.